
The Map View window is a document window used for creating Map View definitions and executing those definitions i.e. rendering maps.
The window can be opened from the Ribbon' Presentation tab or from the Domain Explorer from a map view template.
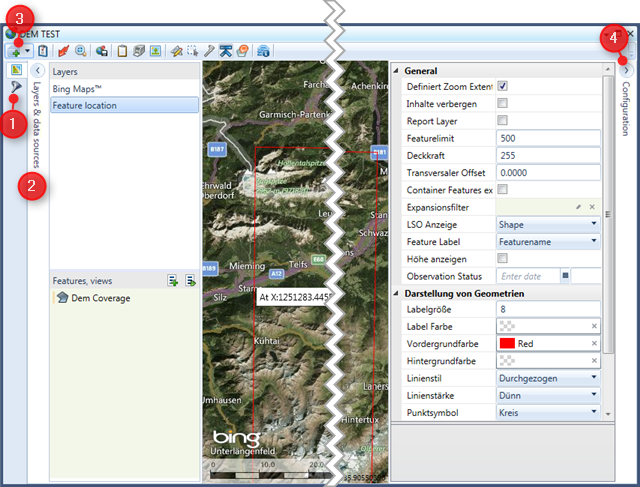
Figure 1: The Map View window showing a simple map
The Map view tab (figure 1:1) shows several different areas. The Data source panel (figure 1:2) is an expandable panel used for defining layers and binding content to layers. In the upper part of this panel a list box shows all currently defined layers. You can add new layers by selecting the Add layer menu button (figure 1:3) and then selecting the type of layer you want to add. The layers in this list are ordered in their rendering sequence, i.e. the first layer in the list will be rendered first and will therefor be the bottommost layer. You can reorder the layers and therefore their rendering sequence using drag & drop. To rename a layer click the Rename button tat appears when you hover the mouse over the layer.
In the Features and views list box you can bind features or views to the currently selected layer by dragging them from the Feature Explorer to this list box. Note that only some layers support binding of features and views, and the layer might restrict that types and number of features you can bind.
The Toggle clear before drop toggle button on just above the Features and views list box defines the behavior when dropping features or views. If enabled the list of features is automatically cleared before you drop new elements, if not enabled newly dropped elements are just added to the list. The Toggle execute after drop toggle button defines if after dropping elements to the Features and views list the Smart Client shall automatically redraw the map.
The Configuration panel to the right of the window (figure 1:4) shows a UConfiguration property grid that is used for displaying and modifying the Map Configuration and the configuration of each individual layer. To show the Map Configuration select Show map view configuration from the window's toolbar. To show the configuration of a specific layer just select that layer in the layers list box. For a documentation of each setting in these UConfigurations please refer to the Application Server documentation.
The central area of the window is used for displaying the rendered map. To execute a map view definition and select Execute from the window's toolbar or press F5. As soon as a map is rendered you can move the shown map by left click and mous move, the zoom level can be changed with your mouse wheel. To return to a full-extent view select Zoom to full extents from the window's toolbar.
The window's toolbar (figure 2) provides commands for modifying the map view definition and for working with the displayed map.
The Add Layers menu button shows all available types of map layers. By selecting one of these layer types a new instance of that layer type is added to the map view definition.
Selecting Show map view configuration will show the global configuration of this map view in the property grid of the Configuration panel.
The Execute button will actually execute the map view definition and render the map.
The Zoom extents button will zoom to the extents of the map view contents.
To save the map view definition (optionally together with the Bindings select Save, the currently rendered map view can be copied to the Clipboard, can be printed directly or can be saved to a bitmap by selecting respective buttons from the toolbar.
Selecting one of the the tool buttons from the window's toolbar (figure 2:1) will activate a specific map tool that allow you to interact with a rendered map view. Once activated most map tools will display additional buttons in the map area.

Figure 2: The Map View window's toolbar
