
The View window is a document window used to create and modify views. The window can be opened from the context menu of a view in the View Explorer window.
On the General tab the Name box shows the name of the view. Each view must have a (non empty) name, maximum length for a view name is 200 characters. The system does not check a view name for uniqueness, but we suggest you choose unique names at least within one hierarchy level.
The description box can be used to describe the view. This description is also shown as tool tip on the view in the View Explorer window.
The Sequence number can be used to define the order in which views will be displayed in the View Explorer window. New views will by default have a sequence number of zero. You can use any integer (negative or positive). In one hierarchy level views with lower sequence number will be displayed before views with a higher sequence number. In the View Explorer window views of one hierarchy level will be sorted first by sequence number and then by name.
The Personal view switch is enabled only on creation of a new view. If you modify an already existing view this check box will be read only. If selected, the view is a personal view and therefore only visible to the current user. Root views cannot be marked as personal views.
The Non-listing view check box defines if the view or not see chapter Non listing views for more details.
You can assign a color to a view, this color is used by the Smart Client (and probably other clients) to display the view.
On the View Filter tab you define the actual filter criteria that defines the members of the view. This tab consists of two main areas. The Expression tree area shows the tree-like structure of the view filter expression, the Details area shows details about the combination node or filter term currently selected in the Expression tree.
In the Expression tree combination nodes are shown with a chain link symbol (Figure 1:1) and the logical operator they represent; possible logical operators are: AND, OR, NOT AND, NOT OR . If you select a combination node in the Expression tree you can configure the logical operator in the Details area. The context menu of a combination node allows you to add subordinate combination nodes or filter terms. All combination nodes except the root node can be deleted. Deleting a combination node will also delete all its subordinate combination nodes and filter terms.
Filter terms are shown with a blue ball symbol and a textual representation of the filter term (Figure 1:2). The textual representation does not always describe all settings of the term, it is just a hint to quickly assess the term. If you select a filter term in the Expression tree you can configure the properties of this filter term in the Details area. Every filter node type has it own properties described in chapter View filter terms.
The context menu of a filter term node allows you to delete that filter term node.
The check box left of each term or combination node deactivates the term or combination node. This can be useful when designing your view terms. Note that a view with no term node or with no active term node will always return in an empty view member set.
Note that the Application Server will always check the supplied expression tree on saving. If the expression tree does not actually filter for any data the Application Server will modify the expression tree by adding a Contradiction term (if view is a root view) or a Tautology term (if view is a subordinate view), or by enabling combination nodes.
The Test filter expression button in the toolbar allows you to test the view filter expression. You have to save any changes the view to make this button enabled. Selecting Test will execute the view with the (modified) filter definition and show the results in the Feature Explorer window.

Figure 1: Example of a view filter as displayed in the Expression tree.
On the View Order tab you define how the member features of the view will be ordered when the view gets executed. See chapter View ordering for a description of available view orderings.
The Domains tab allows you to associate a view with one or more domains. To associate the view with all domains use the respective Switch. To associate a view only with specific domains drag those domains to the list of domains. Note that the association is not inherited by subordinate domains. or subordinate views.
The Workspaces tab allows you to expose the current view as one or more workspaces. If this tab is active the toolbar shows the Add new workspace drop-down button. From this drop-down button you can select a workspace type and create a new workspace of that type. To edit an existing workspace select the workspace in the list view and select Edit from the context menu of the list entry or double click a workspace. Creating and modifying a workspace will bring up the Workspace window. To delete a workspace select delete from the context menu of that workspace or press Del.
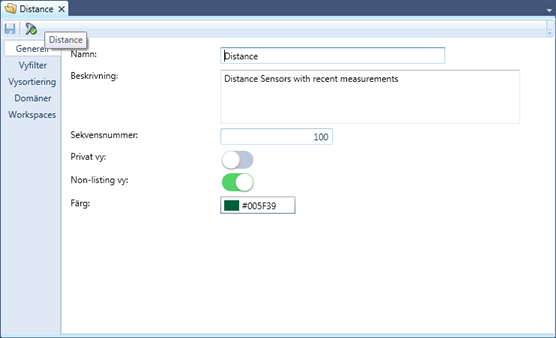
Figure 2: The View Editor window with the General tab opened
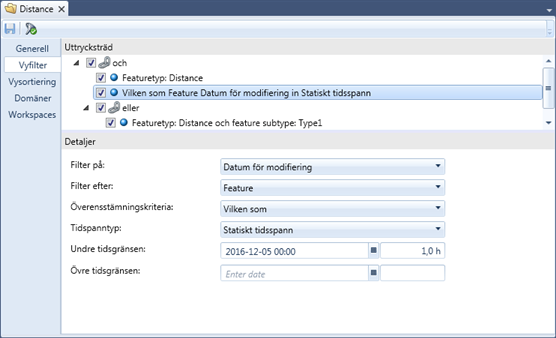
Figure 3: The View Editor window with the Filter tab opened
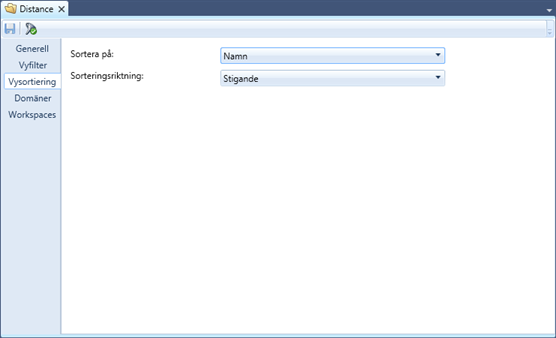
Figure 4: The View Editor window with the View Order tab opened
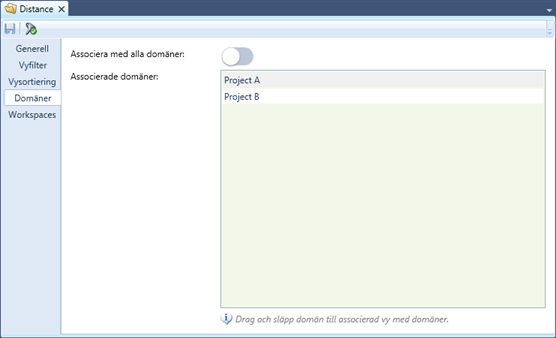
Figure 5: The View Editor window with the Domains tab opened
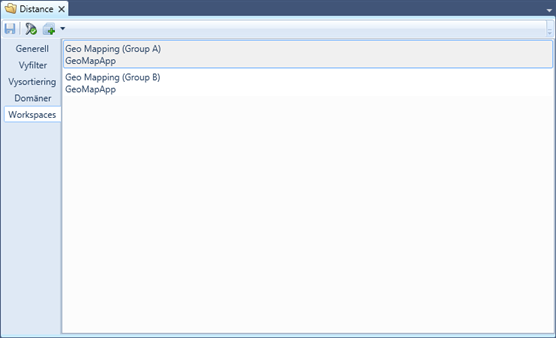
Figure 6: The View Editor window with the Workspaces tab opened
