
The File Depot window is a tool window that shows all files in the current user's File Depot as well as all currently active uploads to the File Depot. You can start this window from the Ribbon's Common tab.
Every user has his own personal file depot on the Application Server and no user can see another users' files in their file depot.
The window shows two main areas the Currently uploading to depot area and the Depot contents area. The Currently uploading to depot area shows the files that are currently being uploaded from the local computer to the file depot on the Application Server. You can initiate an upload by dragging files from Windows explorer to the uploading area or by choosing Add files (Figure 1:2) or Add files from folder (figure 1:3) from the toolbar.
If a filter expression is defined in the windows toolbar Filter box (Figure 1: 4) only those files will be uploaded whose names match that regular expression - regardless of how the files to be uploaded were selected. Leave the box empty if you do not want to apply any filter.
A currently uploading file is shown in the Currently uploading to depot area, with its original file name and current upload progress. You can cancel an upload by selecting Delete from that upload's context menu. As soon as the upload of a file is completed, that file is shown in the Depot contents area.
Files shown in the Depot contents area can be downloaded again by selecting Download from the files' context menu. To delete files in the file depot select Delete from the files' context menu. Files in the Depot contents area can be dragged to other windows that need files (e.g. for importing). Note that the file sizes shown for files that were just uploaded to the Application Server are only shown after you click Refresh (Figure 1:1).
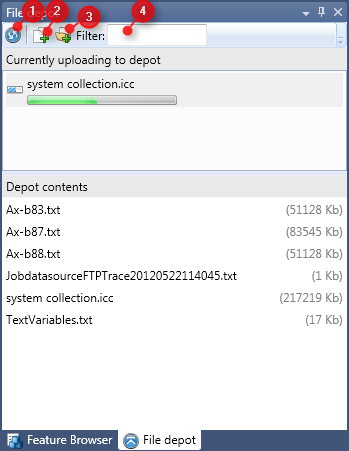
Figure 1: The File Depot window
The initial folder (figure 2:1) used when browsing after selecting Add files or Add files from folder as well as the custom places shown in Windows' Browse dialogue (figure 2:2) can be adjusted using the Smart Client common configuration.
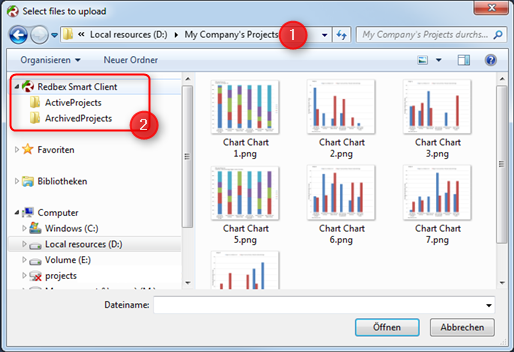
Figure 2: Initial folder and custom places can be adjusted in the Smart Client Common Configuration.
