In Version 1.38.16210.16249 (Priest R5) the Classification Elements Editor of the Redbex Smart Client was enhanced to help you creating and managing classification elements more effectively.
Creating classification elements
Especially when first configuring your Application Server or when configuring a new project (domain) you will have to create multiple classifications and classification elements. To speed up this process we therefore enhanced the Dialogue for defining new elements to classifications.
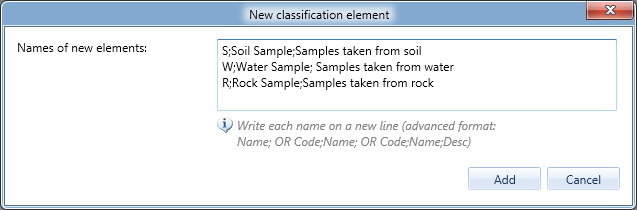
To create classification elements you open the new classification elements dialogue form the toolbar of the Classification Elements Editor. Until now this dialogue just allowed you to specify the names of the classification elements to be created. With the new release you can use this dialogue to specify Code Name and Description of the elements to be created. Just separate Code, Name and Description for each element with a semicolon (see screenshot). Elements without a semicolons will be treated as before (as element name).
Code, Name and Description for the elements to be also be copied from an Excel sheet and pasted it into the text box of this dialogue. Redbex will then automatically add the semicolons for you!
Creating multiple classification elements
Sorting classification Elements
When displaying classification elements in a drop down list Redbex sorts the elements by sequence number and then by name or code (depending on the configuration of your property structure). If you are not happy with alphabetical sorting you can therefore define your custom order by setting the sequence number for each classification element.
Until now you had to do this by just typing in the sequence number for each element. With the new release Redbex can automatically apply sequence numbers in the Classification Element Editor.
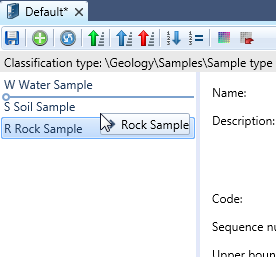
Using Drag & Drop ordering in the classification elements editor
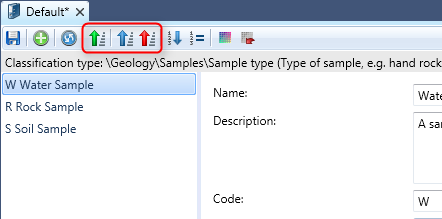
Sorting the list by name, code or default
If you want to reset sequence numbers choose Reset sequence numbers from the toolbar. This will apply sequence number 0 to all elements.

Applying colors
For various presentations (e.g. charts and axis section drawings) it is useful that all classification elements have unique colors. While you can of course choose the colors manually for each element (useful especially if the colors shall follow a specific standard), Redbex can now automatically assign unique and visually distinct colors to all classification elements, thus saving you a lot of time especially when working with a large number of classification elements.
First you should therefore put the classification elements into the desired order. Remember the first element will get the color red, the last element the color blue. You can do this by using the sorting buttons from the toolbar and you can order them manually by dragging and dropping the elements in the list. Again this order is not saved, it is just a temporary order used to apply colors.